This project was submitted by one of our readers, just like you.
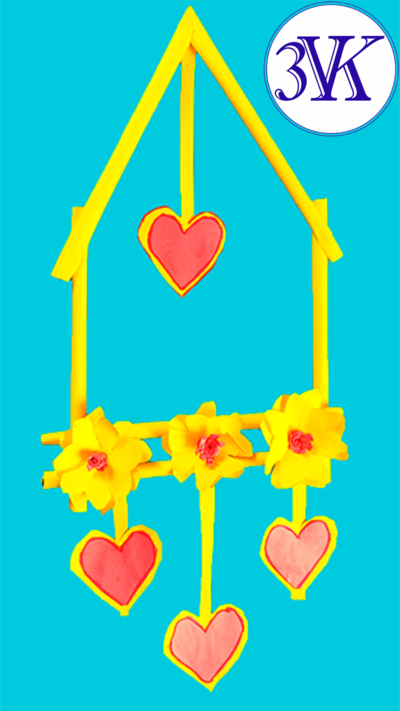
How To Make Paper Flowers On The Wall?
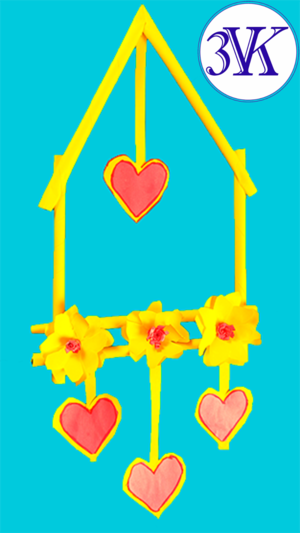
"All children really like to do simple paper crafts with their own hands, including flowers. Paper flowers are simple and beautiful. With their help, you can create a unique postcard, bouquet, and decorate the room for a holiday. Moreover, decorative paper flowers have advantages: • do not fade; • do not require maintenance; • do not cause allergic reactions; • with their help you can create a wide variety of flower arrangements • allow you to decorate the wall as brightly, beautifully and stylishly as possible; • create a festive mood; • do not require rare tools or expensive auxiliary materials for the manufacture. "
Primary TechniquePaper Crafts

Materials List
- double-sided colored paper
- scissors
- fast setting glue
Instructions
-
We take a sheet of paper measuring 12 cm by 30 cm.
-
We take a pencil and bend and twist a sheet of paper around it.
-
We glue the end of the rolled sheet of paper to the base.
-
Repeat steps 1 - 3 two more times. As a result, we get three tubes, as shown in the photo.
-
We cut all the tubes in half - into two identical parts.
-
We make the frame of the craft. We glue parts of the tubes together, as shown in the photo.
-
We begin to make a paper flower. We take a square sheet of paper measuring 8 cm by 8 cm.
-
Bend a sheet of paper in half so that the fold line divides the square into two triangles.
-
Fold the resulting figure in half again, as shown in the photo.
-
We draw a sketch of a flower petal. Cut by sketch.
-
Cut out according to the sketch. Expand the workpiece. We get a flower. Repeat steps 8-11 five more times. As a result, we get all six paper flowers.
-
Bend the flower petals using scissors. We make on three flowers one incision to the center. Glue the adjacent petals with a notch, superimposing one on top of the other.
-
We glue two flowers together in the center. We get three pairs of volumetric colors.
-
We take a strip of colored paper measuring 1.5 cm by 18 cm.
-
Fold a strip of paper in half and make cuts.
-
Straighten the resulting strip of paper.
-
We twist a strip of paper with a tube. Glue the end of the strip. We get the core of the flower.
-
We make a core for two more flowers. We glue the core with the base of the flower, as shown in the photo. We get three ready-made flowers. Then we glue these flowers to the base.
-
We make four hearts from colored paper.
-
Cut out strips of colored paper and glue hearts to them.
-
Paper flowers on the wall are ready !!!
NotesPlease don't forget to subscribe to our YouTube channel 3 VK YT.
Read Next100+ Free Printable Crafts for Kids


