This project was submitted by one of our readers, just like you.
Paper Bag Monster Puppet
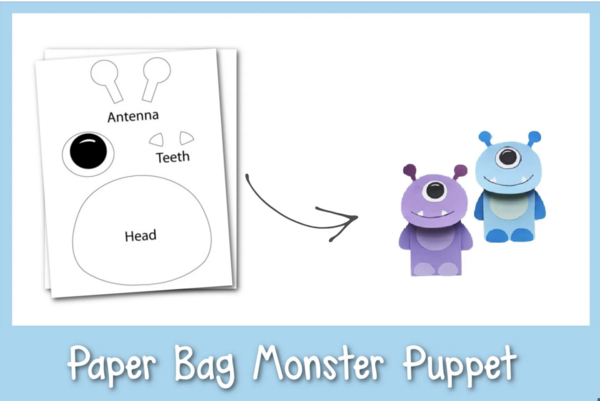
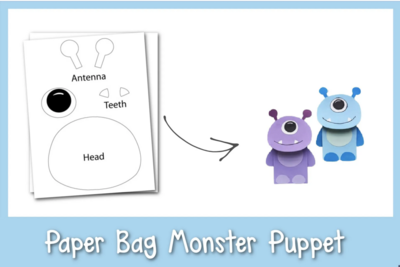
"If your kids love monsters, they will go wild for this cute Paper Bag Monster Puppet! It’s perfect for a fun afternoon project together. With these easy-to-follow instructions, you can start creating and playing with your kids in no time! Colored paper Sharpie Paper bag Craft glue Pencil Scissors Encourage your kids’ storytelling skills by setting up a puppet show theater! You’ll have hours of fun imagining and telling stories with your paper bag monster puppets! You can use googly eyes or decorative scissors to add some fun details to your monster! Let your kids personalize their monsters! Let them choose different colored paper, or draw different faces to make these monsters uniquely theirs!"
Primary TechniquePaper Crafts

Materials List
-
Colored paper
Sharpie
Paper bag
Craft glue
Pencil
Scissors
Instructions
-
Select 2 or 3 different colored papers for the paper bag monster craft. Trace and cut out the template patterns. The template includes head, antennas, teeth, arms, legs, belly, and eye.
-
Attach the 2 antenna cutouts on the top side of the head cutout.
-
Attach the eye cutout near the top middle part of the head. Use a sharpie to draw the mouth line.
-
Attach the teeth cutouts near the top side of the mouth line.
-
Select a paper bag. Measure and cut out a piece of paper to cover either side of the paper bag. The covered side of the paper bag will be the front side of the monster puppet. Attach the leg cutouts on one side of the cut-out paper and attach the belly cutout on the opposite side of the paper.
-
Attach the paper to the paper bag. Keep the legs near the open side of the paper bag. Flatten the bottom side of the bag; this will be the top side of the monster puppet.
-
Attach the head pattern on the flattened bottom side of the paper bag.
-
Attach the arm cutouts on both sides of the paper bag to complete the monster paper bag puppet craft.
Read Next100+ Free Printable Crafts for Kids


