Trendy Locker Magnets
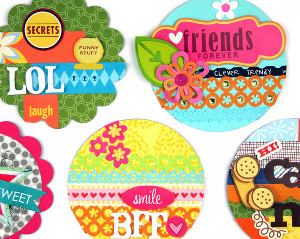
These Trendy Locker Magnets are perfect for adding some character to a boring old locker. Your kids can have some fun when they go back to school by making their locker stand out from all the other ones. Kids are always looking for locker ideas so they can make their locker cute and fun, and paper crafts like these are a perfect idea to show their creativity. They will have a blast designing their own one-of-a-kind magnets, and everyone will be amazed by how bright and colorful they are.

Materials:
- Patterned paper (Bella Blvd)
- Cardstock (Bazzill)
- Crepe paper stickers (Little Yellow Bicycle)
- Stickers (Bella Blvd, KI Memories)
- Alphabet stickers (American Crafts)
- Jewel stickers (Little Yellow Bicycle)
- Chipboard
- Frozen juice lids
- Magnets
- Adhesive
- XXXX-Large Circle Punch
- XXXX-Large Pretty Scallops
- Scallop Sentiment Border Punch
Instructions:
Note: Chipboard is critical to giving some structure to this project. If you don’t have chipboard, you can layer together a few layers of recycled cereal boxes until you get the thickness you desire.
- Punch chipboard using the XXXX-Large Circle Punch or, for a little different shape, you can try using the XXXX-Large Pretty Scallops.


- Dig through your paper scraps to find papers that coordinate well together. Trim the paper to ½” and 1” wide strips using your paper trimmer. Length of the strip doesn’t matter as you can trim that down later. If you’d rather have patterned strips already coordinated for you, look for patterned papers that are printed in this manner such as those by Bella Blvd. You can also add interest by mixing in some cardstock punched with border punches. I used the Scallop Sentiment Border Punch.

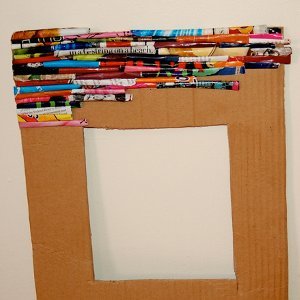
- Adhere strips horizontally across the chipboard using your favorite adhesive. Then, turn the chipboard over and trim the strips using your detail scissors.

- Lastly, add character to the circle using stickers and embellishments to support the fun, trendy sayings that are popular with the teen set these days. For a little different shape, you can try the same process using the XXXX-Large Pretty Scallops. Follow the same process of punching the chipboard and layering patterned paper, or simply punch a piece of chipboard AND a piece of patterned paper and adhere the paper over the chipboard before embellishing.
- Again, once finished, turn the chipboard over and use your detail scissors to trim around the scalloped edge for any embellishment/paper strips that overhang the edge.
- Once completely finished, adhere the chipboard to a metal frozen juice lid to add additional strength and support to the overall piece before adding a strong magnet to the back. If the piece will be used more for décor rather than its magnetic abilities you can skip adding it to a juice lid and use thin magnetic sheets on the back instead. Thin sheets give it just enough magnet strength to stick to the locker, but not enough to actually be used as a magnet for holding papers.
Note: Another option would be to adhere it to a juice lid, then glue a magnetic bulldog clip onto the back so they can clip up notes or photos of their friends.
Read NextSpectacular CD Weaving Projects

