This project was submitted by one of our readers, just like you.
Adorable Felt Rabbit Craft

Adorable Felt Rabbit Craft
"I have taken my kids to those fun baby animal petting zoos in the springtime and the little rabbits are hands down the favorite, every year! They are fluffy and soft and have the sweetest little faces and ears. This felt rabbit craft will be a fun activity you can do with your kids where you can make your rabbits as soft and lovable as you want! The options are endless when it comes to designing and decorating your new furry little friend. This craft is going to be a favorite for your kids!"
Primary TechniqueFabric Crafts

Materials List
- Felt fabric
- A pencil or marker
- A pair of scissors
- A needle
- Matching thread
- Cotton
Instructions
-
Select your desired color of felt fabric for the base, head, lower body, outer ears, and tail of the rabbit. Select pink for the inner ears and white or light pink felt for the belly pattern.
-
Use a fabric marker to trace the provided patterns on the selected felt fabrics and cut them out using scissors.
-
Place the belly cutout on the lower body cutout, in the center. Thread a needle with the matching color to the felt you chose for the belly cutout.
-
Place the inner ear cutouts on the outer ear cutouts.
-
Use the matching thread color with the inner ear parts and stitch them with the outer ears.
-
Use a marker to draw the eyes, nose, and mouth of the rabbit.
-
Use black thread to stitch along the traced eyes, mouth, and nose.
-
Stitch the 2 tail cutouts together around the round edge.
-
Place the base cutout on a flat surface and then place the ear patterns on the top side of it. Slightly overlap the narrow ends of the ears with the top side of the base.
-
Place the head pattern on the head part of the base, keeping the ears between the base and head layers.
-
Work flat blanket stitches around the sides and appliqué stitches when crossing the ear parts.
-
Place the lower body pattern on the body part of the base; keep the head to the front.
-
Stitch towards the lower body part and stop stitching at one point on either side (left or right) to insert the tail between the lower body layers.
-
Work appliqué stitches to attach the tail part with the base and body layers. Work flat blanket stitches for the rest of the sides.
-
Remember to keep an open end for stuffing. Use cotton for stuffing.
-
Stuff the head and the lower body part individually.
-
When the stuffing is done, stitch the open end to secure the stuffing. Tie a knot or 2 and cut off the extra thread.

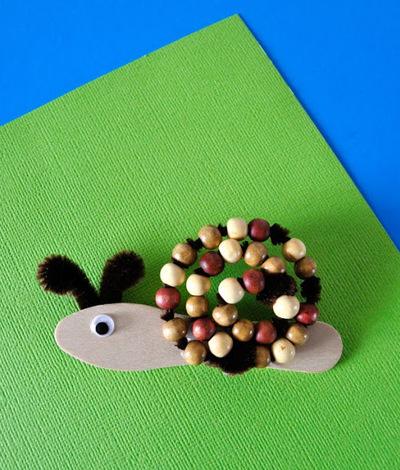
Read NextBeaded Popsicle Stick Snail