This project was submitted by one of our readers, just like you.
Lorax Papercraft Puppet
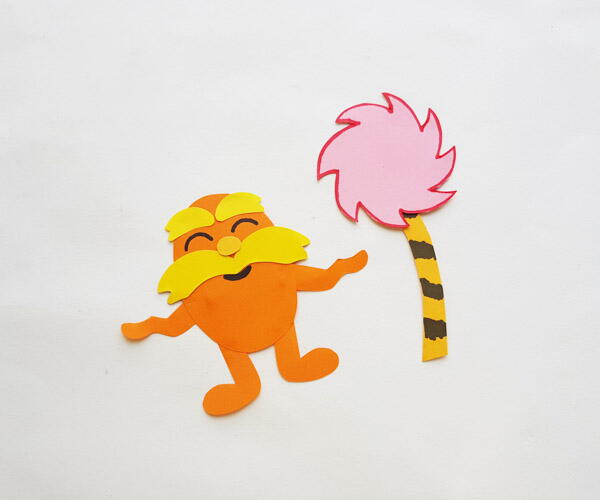
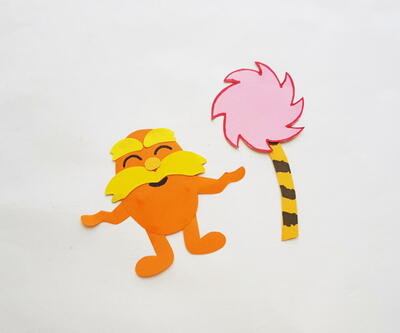
"This Lorax Papercraft Puppet is the perfect pal for your kiddos to have creative adventures. Your family will have the best time creating this Dr Seuss friend on an afternoon in! They are sure to be speaking for the trees in no time! This pal can also be a good tool in teaching your kids the importance of taking care of our lands and nature and the purpose they have in our lives! Just follow these simple instructions with these easy supplies!"
Primary TechniquePaper Crafts

Materials List
- Colored craft papers
- Craft glue
- Sharpie
- Pencil
-
Scissors
Instructions
-
Select orange, yellow, and 2 to 3 different colored craft papers. Trace the body, legs, and arm patterns of the Lorax on orange colored craft paper; trace the eyebrows and mustache on yellow colored craft paper and trace the nose on a different shade of yellow or orange paper. Trace the Lorax tree patterns on colourful papers and the trunk on yellow paper. Cut out the traced papers nicely.
-
Glue the 2 leg patterns on either side of the oval (body) shape cutout. This will be the bottom side of the Lorax puppet.
-
Glue the mustache pattern slightly above the middle of the body pattern.
-
Glue the nose right above the mustache, in the middle. Glue the eyebrow patterns along the top side of the body pattern.
-
Glue the 2 arms on both sides of the body pattern.
-
Grab the Lorax tree patterns. Use a black sharpie to draw shades on the trunk cutout. Use the same shade of sharpie to trace an outline on the Lorax tree cutout.
-
Glue the tree pattern with the trunk pattern and use a black sharpie to draw the eyes and mouth of the papercraft Lorax.
Read NextFairy Baby Felt Craft for Kids


