This project was submitted by one of our readers, just like you.
Seahorse Papercraft
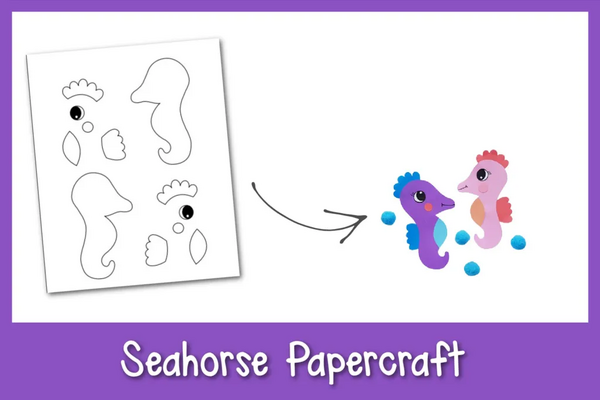
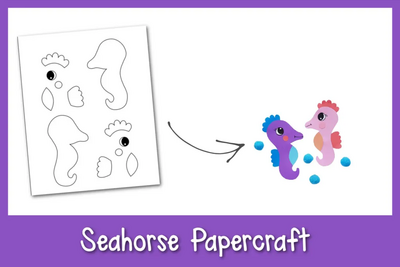
"This cute seahorse paper craft is a fun activity that requires few materials and uses things you likely already have in your home! You just need construction paper, craft glue, a sharpie, a pencil, and scissors. Kids will have fun picking different colors of paper to use to make the body parts, and then put their seahorse together using the body parts. Tips and tricks are included for getting more creative with each seahorse paper craft."
Primary TechniquePaper Crafts

Materials List
- Construction paper
- Craft glue
- Sharpie
- Pencil
- Scissors
- Printable Template
Instructions
-
Select 3 different colored sheets of construction paper for this Seahorse Papercraft. Trace the fin patterns in one color. Then trace the body base on another colored piece of paper. Finally, trace the front body pattern on another different colored sheet of construction paper. Also, be sure to trace the small round shape (the blush spots) onto a pink-colored paper.
-
Once all of the patterns have been traced, you can cut out all of the shapes. You can cut out the eye directly from the template.
-
Use craft glue to glue the top fin and the back fin onto the body base cutout.
-
Next, glue the front body cutout onto the belly part of the body base cutout.
-
This step is all about the details. Begin by gluing the eyes and the blush cutouts onto the head part of the body base. Then use a sharpie or black gel pen to trace the mouth of the papercraft seahorse. Feel free to get creative and add more details using colorful sharpies too!
-
Tips and Tricks - Use googly eyes instead of the paper cutout eyes for more silliness and animation! - Get creative with the colors of your construction paper! Make multiple and experiment with different color palettes for each one! - Glue a popsicle stick to the backside of this craft to turn it into a puppet!
Read NextSea Otter Cupcake Recipe for Kids


