Sticky Note Calendar
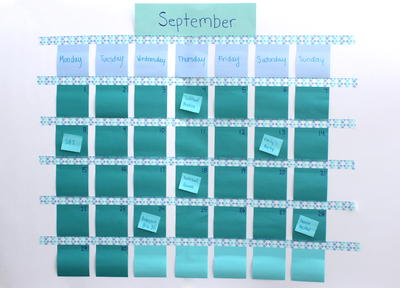
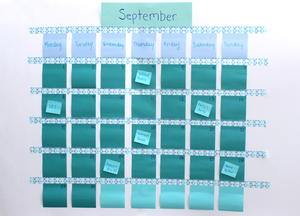 There's no need to go out and buy a calendar anymore. With supplies you already have in your junk drawer or sitting on your desk right now, you can make a super easy Sticky Note Calendar. It is super easy to change out this DIY calendar every month. You can also take the sticky note for the day with you and it can double as your to-do list. This back to school craft will only take you minutes to complete and it will be more than worth it when you are perfectly organized for the upcoming year.
Materials:
- 3 different colors of sticky notes
- Washi tape
- Sharpies
- Mini sticky notes
Instructions:
1. As straight as you can, place a 4 foot piece of Washi tape on the wall about 3 inches below where you want the top of the calendar to be.
2. Under that piece of Washi tape, stick 7 sticky notes to the wall and write the days of the week on each one.
3. Place another piece of Washi tape under the days of the week and add 5 rows of a different color sticky note to represent the days of the month. Write the days in the top right corner. Make sure you start numbering them on the correct day of the week.
4. Above the first piece of Washi tape, place 3 sticky notes of the last color direct next to each other. On these stick notes, write the month.
5. Use the mini sticky notes to add events to your calendar.
Want more back to school crafts? Find this project and more in our FREE eBook: 13 DIY School Supplies: Back to School Ideas for Kids of All Ages!
Read NextMagical Tie-Dye Mason Jars


