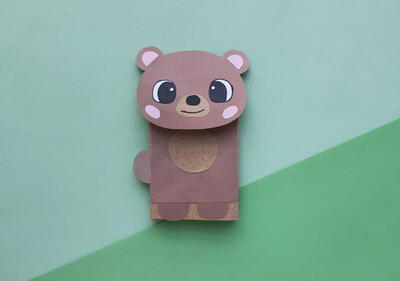
Bear Paper Bag Puppet

"This unBEARably adorable Bear Paper Bag Puppet is the perfect craft for some outdoor adventure time! Bring this craft along on all your camping trips for a fun companion for your kiddos and for some quality family bonding time! Your kids are sure to be "beary" excited about this new puppet pal! Follow these simple instructions with these few supplies because this project is perfect for any age! Your kids are sure to love this quality craft!"
Primary TechniquePaper Crafts

Materials List
- Colored craft papers
- Paper bag
- Sharpie
- Craft Glue
- Scissors
- Pencil
Instructions
-
Select black, pink and 2 different shades of brown colored craft papers for the bear paper bag puppet craft. Trace the inner ear and blush cutouts on pink paper, trace the nose on black, trace the belly and front part of the face on a lighter shade of brown colored paper and trace the rest of the patterns (head, body, legs and tail) on the other shade of brown colored paper.
-
Attach inner ear cutouts on the ear parts of the head pattern. Cut out a piece of paper from the darker shade of brown colored craft paper to cover either side of the paper bag. Attach the belly cutouts in the middle of the body cutout.
-
Attach the leg cutouts on the bottom side of the body pattern and attach the tail cutout on either side of the body pattern.
-
Attach the front part of the face cutout a little below the center of the face pattern. Attach the nose cutout near the top side of the front-face part.
-
Attach the eye cutouts and the blush cutouts on the head pattern of the bear papercraft pattern.
-
Use a pen or sharpie to draw the mouth of the papercraft bear. Select a paper bag for the bear paper bag puppet craft.
-
Attach the body pattern on either side of the paper bag but make sure to keep the legs facing the open end of the bag; this will be the bottom side of the paper bag bear puppet.
-
Attach the head pattern on the bottom side of the paper bag and then flatten the head with the body pattern to complete the craft.
