Clay Ice Cream Cone Pen
Take a little taste of summer fun with you anywhere you go with this Clay Ice Cream Cone Pen. Clay project ideas like this one are sure to be loved by everyone, so kids could easily give this Clay Ice Cream Cone Pen as a gift to their BFF. This clay project uses a very lightweight clay, so the pen is very easy to use. Kids can even modify this Clay Ice Cream Cone Pen to reflect all their favorite flavors. Doing homework has never been so sweet!

Materials:
- Pluffy Variety Pack, Pastel, Kit, Beige - 1 block
- Pluffy Variety Pack, Primary, Kit , Brown - 1 block
- Pluffy Variety Pack, Primary, Kit, Primary Red - 1 block
- Pluffy Variety Pack, Tropical, Kit, Lime - 1 block
- Pluffy Variety Pack, Pastel, Kit, Pink - 1 block
- Sculpey® Clay Conditioning Machine
- Sculpey Clay Tool Starter Set
- Pen
- 3.5" Circle Cutter
Notes:
- Polymer clay may stain. CLAY MAY DAMAGE UNPROTECTED FURNITURE OR FINISHED SURFACES. DO NOT USE polymer clay on unprotected surfaces. We recommend working on the Sculpey clay mat, wax paper, metal baking sheet, or disposable foil. Start with clean hands and work surface area. Knead clay until soft and smooth. For best results, clean your hands in between colors. Shape clay, pressing pieces together firmly. Bake on oven-proof glass or metal surface at 275°F (130 °C) for 15 minutes per ¼" (6 mm) thickness. For best baking results, use an oven thermometer. DO NOT USE MICROWAVE OVEN. DO NOT EXCEED THE ABOVE TEMPERATURE OR RECOMMENDED BAKING TIME. Wash hands after use. Baking should be completed by an adult. Begin by preheating oven to 275 °F (130 °C). Test temperature with oven thermometer for perfectly cured clay. For best results, condition all clay by running it through the Clay Conditioning Machine for several passes on the widest setting. Fold the clay in half after each pass and insert the fold side into the rollers first.
Instructions:
- Remove ink cartridge from the pen. Mix Beige and Brown, 1:1 (even amounts of each). Make one 1-1/8" ball. Shape into a thick log and press the pen through it. Shape around the pen to make a 3-1/4" cone around the bottom part of the pen.
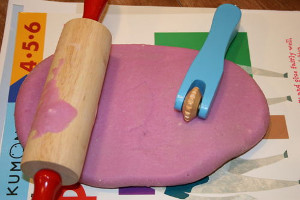
- Roll out the Light Brown mixture of clay from Step 2 on number four on the clay conditioning machine and cut out a 3-1/2" circle. Gently press lines into it using a purple modeling tool to create a waffle pattern. Fold around the cone shape. Bake according to the direction above and let cool.
- Cut small rectangular pieces of Brown Clay for chocolate chips and chop up a small amount of red clay for the strawberry pieces. Bake according to the directions above and let cool.

- Make two 1 1/8” balls of both Lime Green and Pink. Make one 1” Beige ball. Stretch the bottom of both the Pink and Beige balls to create the drippings of the ice cream.

- Make a ¼” Red ball for the cherry and press onto the top of the ice cream. Press chocolate chip pieces into the Lime Green Clay and strawberry pieces onto the Pink Clay. Bake according to the directions above and allow to cool completely. Reattach the ink cartridge.

